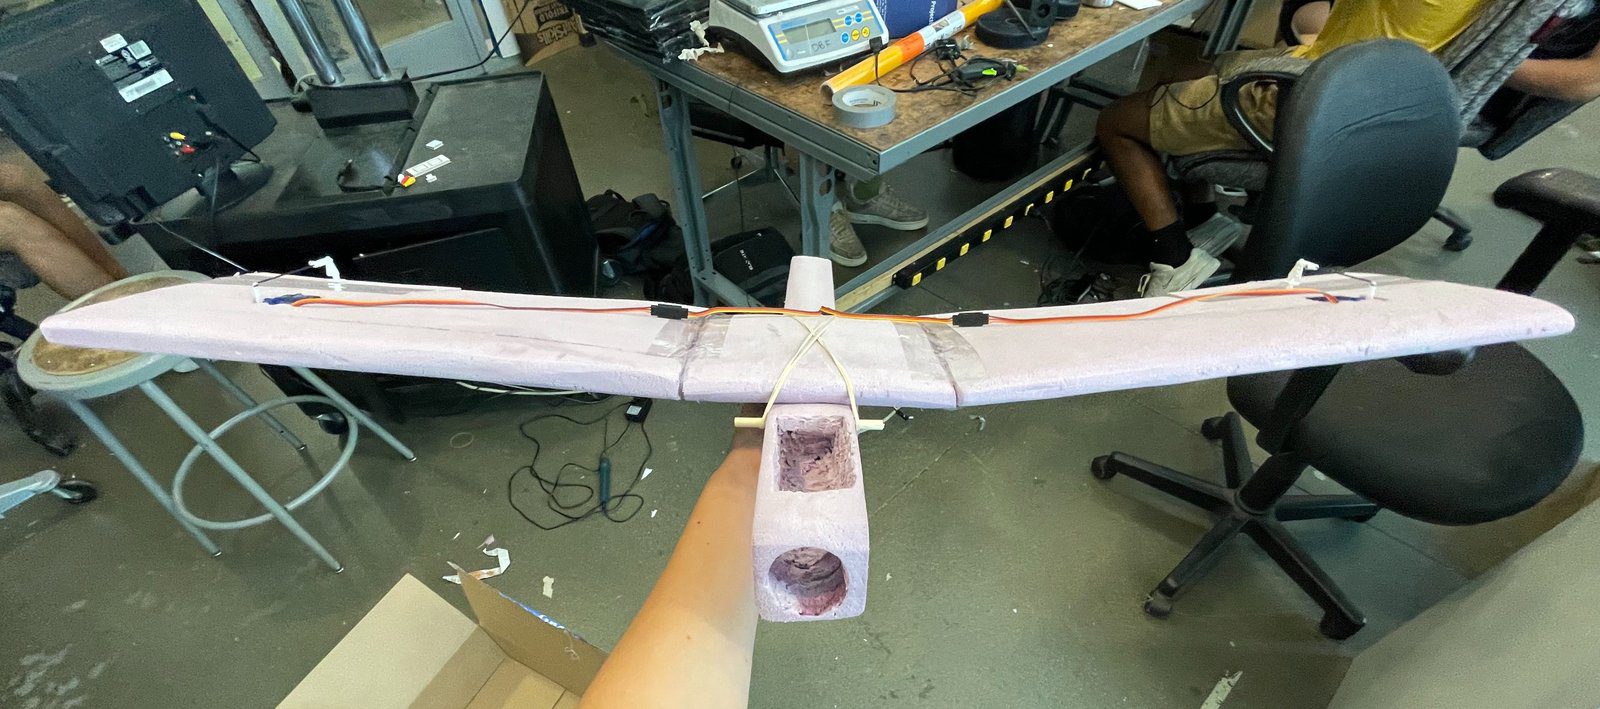
This week marked the final chance to build a successful aircraft. However, this time I chose a different strategy to build the aircraft. Instead of using laser-cut structures, like spars for the wing, I decided to try using the thick pink foam that I had previously tested in the first week.

Foam Wing Construction
The downside of working with this thick pink foam is it can be a handful to shape. Above, is the wing I built, which took me several hours to make, since the foam requires a lot of sanding to achieve the desired shape. As you can see above, I made the wing in three separate parts in an effort to render the plane more stable due to the wing’s dihedral shape. Unfortunately, this weakened the structural integrity of the wing, despite my efforts to bolster the joints.

Fuselage Design and Removable Wings
Above is an image of the fuselage. One key feature that I included in my plane was having removable wings. The wooden dowels as seen above allow rubberbands, which essentially hug the wing in place, to wrap around them so that the rubber band’s elasticity could secure the main section of the wing. In addition, I had two compartments in my fuselage, which allowed me to store electronics and a battery. I would later learn, that I should put the battery in the compartment that was furthest forward since the center of gravity was too far back.

Above is the final aircraft that I meticulously designed and built, showcasing the culmination of my engineering skills and dedication. I have successfully achieved my goal of building a proper plane, my next step is to test its flying capabilities.
More about my UCLA E96A experience:



Leave a Reply